Photo to Laser Engraving Converter
Choose a photo, set the engraving size and DPI, pick a dither mode and download a PNG ready for your laser software.
This free Photo to laser engraving tool turns a JPG, PNG or WebP picture into a black-and-white image sized and dithered for a laser engraver. You set the engraving width and resolution, choose an engraving mode, and download a PNG that laser software can import at the correct physical size.
The tool runs in your browser, so there is nothing to install and no sign-up. Your photo is processed on your device and is never uploaded. A built-in sample picture appears until you choose your own, so you can see how the settings change the result before you start.
It works for engraving a picture on wood, glass, slate or coated metal. Because the Original and Result are shown side by side, you can check the tones before you send the file to your machine.
At a glance
Photo to Laser Engraving Converter is a free browser tool that resizes a photo to an engraving size and DPI, adjusts its tones, dithers it, and downloads a PNG.
- Accepts JPG, PNG or WebP photos and downloads a black-and-white PNG for a laser engraver.
- Resolution presets are 254, 300, 318, 400 and 500 DPI, or a custom value.
- Engraving modes include Grayscale, Threshold, error-diffusion dithers, and Bayer 4×4 or 8×8.
- Runs in the browser with no sign-up; photos are processed on your device and never uploaded.
- Does not set laser power or speed, and does not crop images.
- Example: 100 mm wide at 318 DPI gives 1,252 × 835 px for a 3:2 picture.
Sources: Laser engraving (Wikipedia) (checked 2026-10-15)
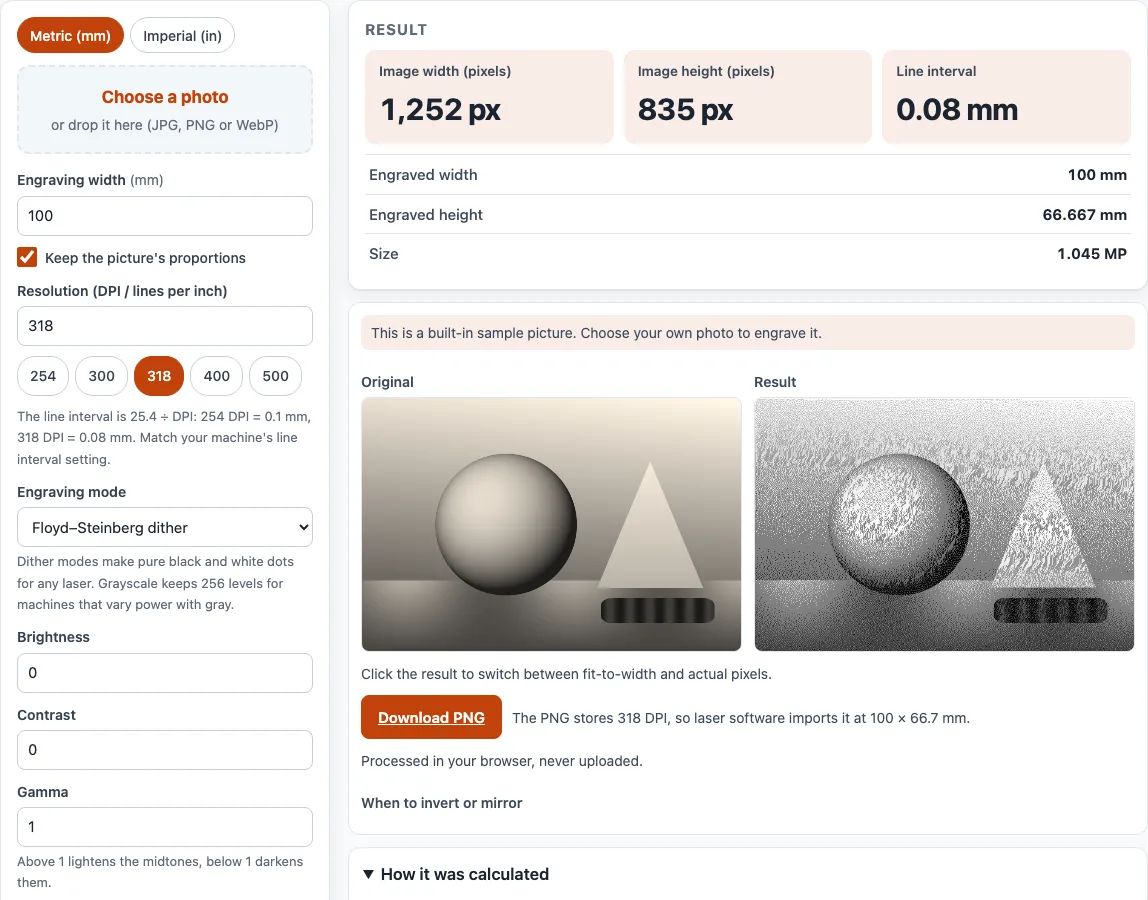
How to use the Photo to laser engraving tool
- Choose a photo with the file picker, or drop one onto the tool. Use a JPG, PNG or WebP file.
- Set the Engraving width. The height follows automatically unless you untick Keep the picture’s proportions.
- Pick a Resolution: 254, 300, 318, 400 or 500 DPI, or enter a custom value. Match it to the line interval in your laser software.
- Adjust Brightness, Contrast, Gamma and Sharpen (unsharp mask) until the Result looks right.
- Tick Invert for materials where the mark comes out light, such as slate, black anodised aluminum, coated metal or glass. Tick Mirror left-right only for glass engraved from the back.
- Choose an Engraving mode: Grayscale, Threshold, one of the error-diffusion dithers, or Bayer 4×4 or 8×8.
- Compare the Original and Result side by side.
- Click Download PNG. The file name includes the size and DPI, for example photo-engrave-100mm-318dpi.png.
Use the Metric (mm) / Imperial (in) switch at the top of the tool to change units. Under the result, Print / save result prints your inputs, results, calculation steps and the date; choose Save as PDF in your browser’s print dialog to keep a PDF. Copy link reopens the page with the same inputs, and Reset clears them.
How to prepare a photo for laser engraving
Start with a photo that has a clear subject, a good range of light and dark areas, and no heavy background clutter. Crop it to the shape you want in any photo editor first (this tool does not crop), then set the engraving width to the real size of your piece. A laser can only mark what the image contains, so a dark, low-contrast photo usually engraves as a muddy patch.
Adjust Brightness, Contrast and Gamma while watching the Result panel. Light, even woods such as maple, birch plywood or alder usually engrave photos with more detail than woods with strong grain or dark colour. Avoid enlarging a small picture by more than 2×, because the result will be soft. Pictures above about 40 megapixels work but render slowly.
What DPI for laser engraving
The right DPI depends on your laser’s spot size and the material, so test on scrap first; the tool offers 254, 300, 318, 400 and 500 presets. DPI sets the line spacing: line interval = 25.4 ÷ DPI mm, so 254 DPI gives 0.1 mm lines and 318 DPI gives about 0.08 mm. Pixel size = engraving width × DPI ÷ 25.4 for a width in millimetres. For example, 100 mm wide at 318 DPI gives 1,252 × 835 px for a 3:2 picture. Match the DPI to the line interval in your laser software.
What is dithering in laser engraving
Dithering turns gray tones into patterns of pure black and white dots. A laser that only fires on or off cannot make a shade of grey directly, so dithering lets it show light and dark areas through the density of marks. Error-diffusion dithers such as Floyd–Steinberg, Atkinson, Jarvis–Judice–Ninke and Stucki spread the error from each dot to its neighbours, giving natural, grainy detail. Bayer ordered dithers (4×4 and 8×8) place dots in a fixed pattern, giving a regular crosshatch look. Threshold turns every pixel fully black or white with no grey, and Grayscale suits machines that vary power with gray levels (256 levels).
Sources
Data and rules used by this tool (checked October 2026):
Frequently asked questions
Can I engrave a photo on metal?
Yes, but the result depends on the metal and its coating. Black-anodised or coated metal often needs Invert, because the laser mark comes out light, so the picture looks right, and you should test a scrap piece first. The tool does not set laser power or speed for you.
Why does my engraved photo look like a negative?
Lasers burn dark pixels, so on light materials such as wood or paper the picture is correct without changes. On slate, black anodised aluminum, coated metal or glass, the mark comes out light, so tick Invert.
Does the tool suggest laser power or speed?
No. Power, speed and focus depend on your machine and material, so run a test on an offcut before engraving the final piece.
Is my photo uploaded anywhere?
No. The photo is processed in your browser and is never uploaded. Nothing you type or upload is sent anywhere.
Can I use the engraved PNG in paid work?
Yes. Results and files can be used in commercial work such as quotes, client jobs and products you sell, royalty-free and without attribution. Verify critical designs against the applicable standard and supplier data, since results are for estimation.
Related tools
- Laser cutting cost calculator: use it to estimate what a laser job will cost before you quote it.
- Laser cut box generator: use it when you want a cut box or enclosure to go with your engraved piece.
- Gear generator: use it to create gear profiles for laser cutting.
- Sheet metal gauge chart: use it to check material thickness by gauge number.
- Aluminum gauge chart: use it when you need thickness values for aluminum sheet.
- Bend allowance calculator: use it to work out how much material a bend takes up.
- Metal weight calculator: use it to estimate the weight of a metal part before shipping or handling.
- Laser spot size calculator: use it to find your focused spot size.